
17 Instagram tips for beginners – tips on how to use Instagram!
17 Instagram tips and tricks you wish you knew sooner
Instagram tips for beginners! Did you know that you could see all the posts you have ever liked on Instagram at once? Did you know that there is a feature on Instagram that allows you to delete offensive comments? Do you know how to clear your Instagram search history? Did you know that you can use special and attractive fonts to write a bio on your Instagram page? Fonts that are not ordinary and distinguish you from others.
If you are unaware of all these tips and tricks, think about many other interesting secret Instagram tips to know about this social media platform. Things that you didn’t know even exist. Would you like to learn more about these ig tips along with many other useful techniques? If your answer is Yes, then you are in the right place! Instagram, this exciting platform, is becoming more and more attractive and unveiling new features and capabilities. So, if you really want to get the most out of Instagram and make the most of all the potential of this app, it’s best to read this article carefully.
Follow us to the end of this article from Twilinstok website, to learn everything about Instagram tips. Of course, first of all, I need to remind you that in order to use these ig tricks, you must use the latest version of Instagram.
The 1st Instagram tip: How to have multiple Instagram accounts with the same phone number?
If you are one of those people who isn’t satisfied with having only one account on Instagram and wants to have several accounts, I have good news for you! You do not have to have multiple phones to have multiple Instagram accounts. Until now, you may have thought that, for example, to have 3 accounts, you must have 3 phones. But it is not like that.
You can manage multiple Instagram accounts and visit all of them with just one phone. But how? It’s so simple! To do this, just take the following steps in order:
- Log in to your Instagram page and touch the profile tab.
- Then click on the three-line icon at the top right of the screen.
- Select the setting option.
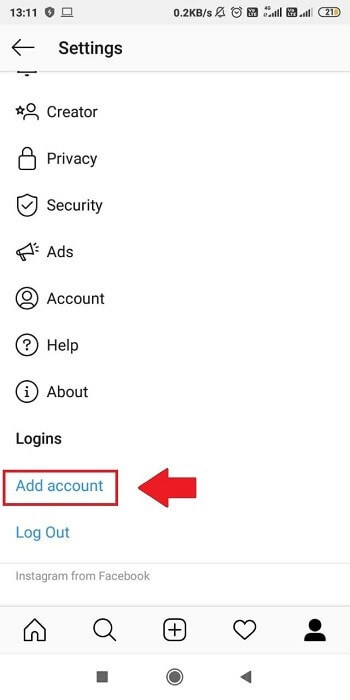
- A list will appear where you have to choose Add account among the available options.
- Then enter your username and password to add a new account.
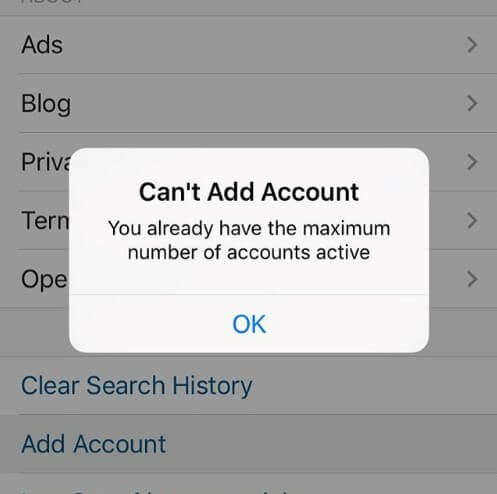
It does not matter what type of account you have on Instagram or what kind of account you want to add to it. For example, you might have a business account on Instagram and then decide to add a personal account to it. Or, for example, create a page for your pet that you are very interested in, and after a while, add a public page to it and produce and publish the content you want on it. However, this method will definitely get you started. If you are wondering about the question: how many Instagram accounts can you have with one phone number? The answer is 5. The number of accounts you can create on Instagram with just one phone must be less than 5; Otherwise, you will receive the message you see in the image below from Instagram.
Finally, if you have multiple Instagram accounts on one phone, to switch between them, touch your profile picture in the bottom bar for a few seconds to see all the accounts you have on that phone. Then, by selecting any of the accounts you have, you can easily switch from one account to another. This Instagram trick is especially necessary for those who have an Instagram admin job and it is very useful for them.
The 2nd Instagram tip: How to see every post you have ever liked on Instagram?
Have you ever wanted to see every post you have ever liked on Instagram at once? I can say that this is possible. Just as there is a folder on Instagram where you can see saved posts, there is also a folder where all the posts you have ever liked are located.
Interesting point: It has happened many times that I have seen a video that I liked and I decided to show it to my sister; For whatever reason, my sister was not available at the time, so I decided to show her later. Most of the time, I forget to save it and when I want to show it to her, I also forget what account it was from. As a result, I go to the section that shows my liked posts and see that it is not there either. 🤦🏼♀️😂Your lesson today is that if you like a post on Instagram, be sure to like it so you can find it later (LOL).
If you want to see all the posts you have liked so far at once, you need to take the following steps in order:
- Log in to your Instagram page and touch the profile tab.
- Touch the three-line icon at the top right of the screen.
- Enter the setting section.
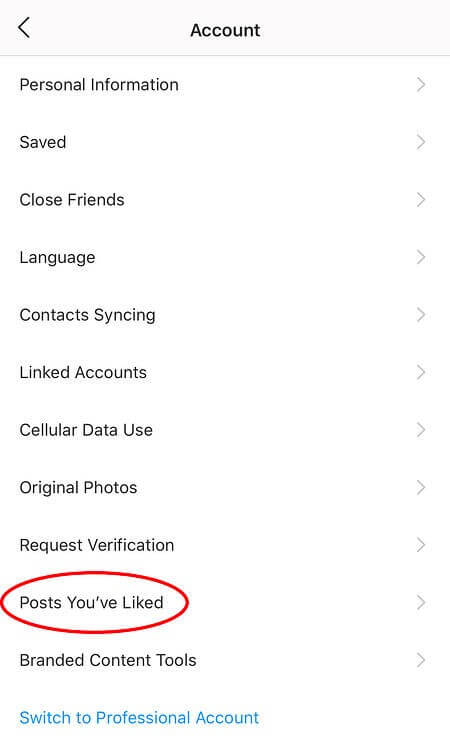
- In the setting section, a list will be shown to you in which you must select the account option.
- Then select the “posts you’ve liked” option in the account section, as shown below.
In addition, you can unlike any post you want in this folder. This means that without the owner of the post realizing it, if you are no longer interested in that post, you can remove your likes from it.
The 3rd Instagram tip: How to filter out negative/spam comments on Instagram?
Sometimes you share a post on your page, but unfortunately, people leave ugly and insulting comments under it. Most of the time, all you need to do with these people is to ignore them, because there are always people who want to take you away from your goal with negative energy. But the problem starts with the fact that the comments of these people question your credibility and cause others to distrust you.
Fortunately, Instagram has three great solutions to this problem so that you can use any of them to prevent this type of negative and inappropriate comments on Instagram.
The first method: How to filter negative and insulting comments on Instagram
One of the fantastic features of Instagram is that it can filter bad comments. But what does it mean to filter negative and insulting comments on Instagram? Filtering comments means that you allow Instagram to automatically filter comments if they contain abusive or offensive language. To enable this feature, you just need to take the following steps in order:
1- Log in to your Instagram page and click on the profile tab.
2- Then click on the three-line icon at the top right of the screen.
3- Select the setting option.
4- In the list that appears, select Options.
5- Then select comments from the available options.
6- At this step, a new page will be displayed on which you must enable the Hide inappropriate comments option.
7- You can also type and enter a series of keywords a little lower on the same page to filter if a comment contains these words.
The second method: How to delete negative and insulting comments on Instagram?
If you have this question: how do I delete a comment on Instagram, this method is for you. This method, which is also very simple and easy, should be done step by step, as follows:
- Touch and hold the comment that you want to delete for a few seconds.
- The trash can icon will appear at the top of the page, which you must select to delete the comment.
The third method: How to turn off comments on Instagram?
Sometimes it happens that you do not have the patience for any comments and do not want to deal with any comments at all. In these cases, the best thing you can do is to turn off the comments. To turn off comments on Instagram, you must take the following steps in order:
- After selecting the photo or video that you want to post on your Instagram, and after filling in the caption, location and tag at the bottom of the page, touch the Advanced setting option.
- Then a new page will appear on which you can enable the Turn off commenting option.
As you can see, you can choose one of these 3 practical tricks of Instagram and use it to avoid negative and abusive comments.
The 4th Instagram tip: How to clear your search history on Instagram?
Many of us, for some reason, prefer to clear our search history in various applications. Instagram is no exception. While clearing your Instagram search history may not seem like a difficult task, many people still do not know how to do it. Of course, there is no need to worry at all, because we are supposed to teach you how to clear your search history on Instagram completely. To do this, you just need to take the following steps in order:
1- Enter the Instagram Explore section, which has a magnifying glass symbol.
2- Click on the Instagram search bar.

3- Click on the See all option.
4- All your Instagram searches are shown now. Now you have to click on Clear all to clear your entire search history.
5- In the box that appears, select Clear all.
6 – Your Instagram search history is now cleared.
The 5th Instagram tip: How to change the font on your Instagram bio?
Well, let’s move on to the next tip on Instagram. This tip is very attractive and special and makes you different from others. If you want to be unique, we suggest that you use special fonts to write a bio on Instagram. You may say to yourself that there is no such feature on Instagram that you can use to change the font of your bio on Instagram. So let me teach you a way to get around this limit easily.
If you want to use special fonts to have a more attractive bio, you need to use special websites. Now you may be wondering what website you should use to do this. In the following sections, we will introduce you two sites from which you can get help. But the important thing here is the device you are using. Do you use your phone or PC to log in to Instagram? Since one of the websites that we are going to introduce below is for phones and the other is suitable for PCs, so be careful not to make a mistake.
How to change the font on your Instagram bio with LingoJam when logging in with a phone?
If you are active on Instagram through your mobile phone and you want to write your bio in a special font, use the LingoJam website to make your Instagram bio more attractive and beautiful. To change the font on your Instagram bio with LingoJam, do the following steps in order:
1- Log in to LingoJam website.
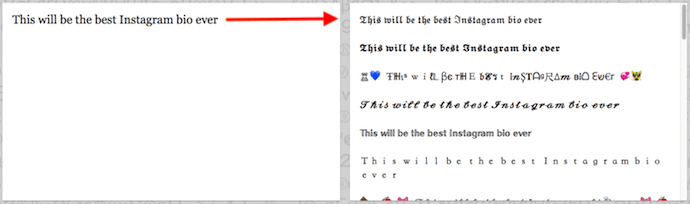
2- Type the text you want in the space on the left, as shown below. Then, on the right side of the page, you will see the same text with various attractive fonts that will be shown to you.
3- From here it’s very simple. All you have to do is select one of the fonts shown to you and copy it.
4- Finally, enter your Instagram page and paste it in the bio section.
So now let’s introduce another great website for those who want to change the font on your Instagram bio from a PC and want to have an attractive bio.
How to change the font on your Instagram bio with FontSpace when logging in with a PC?
If you want to edit your Instagram bio using the desktop/PC, FontSpace is one of the most convenient and fully functional websites that is also very easy to use. To change the font on your Instagram bio with FontSpace, you must do the following steps in order:
1- Log in to the FontSpace website.
2- Like the image below, download the font you like best from the ones shown to you.

3- After you download the font you like, a screen will open on your desktop with a TTF file, as shown below. This file contains different versions of the same font that you have selected.
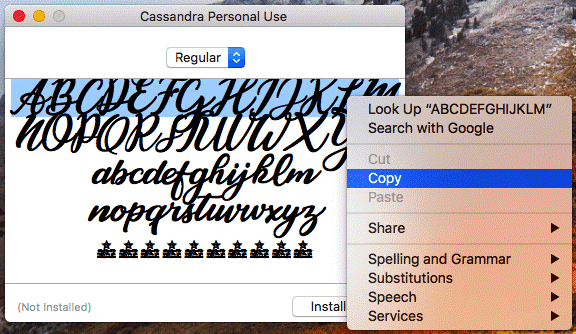
4- Copy your favorite font.
5- Log in to your Instagram page in your browser.
6- In the Profile tab, select the Edit Profile icon.
7- Paste the font you copied before in the Bio box.
8- After pasting the font, a text is written as an example of that font in the bio section.
9- All you have to do is edit the sample text and write your own text.
The 6th Instagram tip: How to add special emojis to your bio on Instagram?
Sometimes, we see emojis in some people’s Instagram bios that we can’t find on regular keyboards. In fact, the phone or desktop keyboard does not have as much variety as it should, and therefore limits our creativity in decorating the bio. Do you think there is no way to escape from ordinary Instagram emojis?
We are going to teach you two easy and fantastic solutions so that you can use attractive and special emojis in your Instagram bio. However, note that one of these two methods is for those who use their mobile phone to log in to Instagram, and the other is for those who log in through a PC.
The first method: How to make custom emojis on Instagram when logging in with a phone?
If you visit Instagram via your mobile phone and want to make your bio more attractive by using special emojis, you need to install the CharacterPad app on your mobile phone. It is very easy to work with this application. Follow the steps below to use this app without any problems.
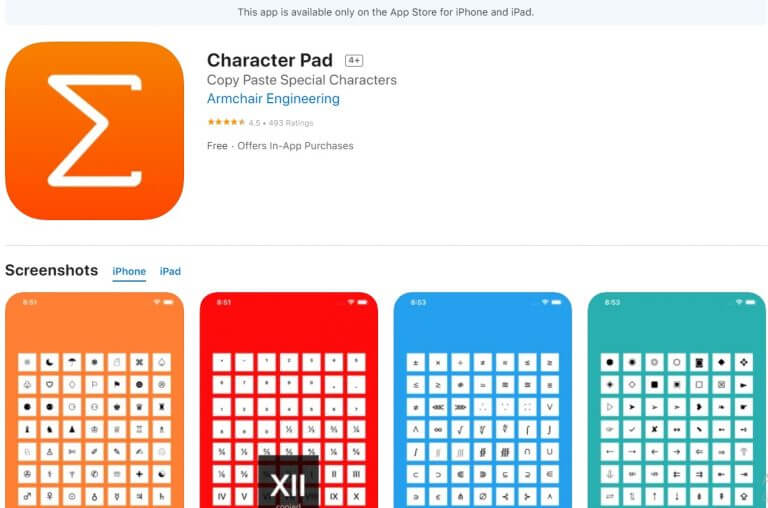
1- Log in to the CharacterPad app. In this application, there are so many different types of emojis that you cannot find them on a regular keyboard.
2- Like the image below, from the available emojis, select the one you like the most and want to put on your Instagram bio. For example, we choose the symbol of the moon.

3- Once you have selected the symbol you want, that symbol will appear in the box at the top of the screen and you can copy it.
4- After copying your selected emoji, go to your Instagram page and select the Edit Profile icon in the Profile tab.
5- A new page will appear on which you have to type the text you want in the bio section and then paste the image you copied as shown below.
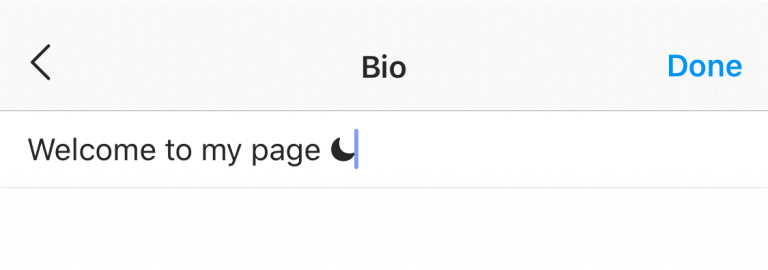
6- Finally, click on the Done option at the top right of the screen.
7- Now it’s the turn of those who log in to Instagram via desktop/PC.
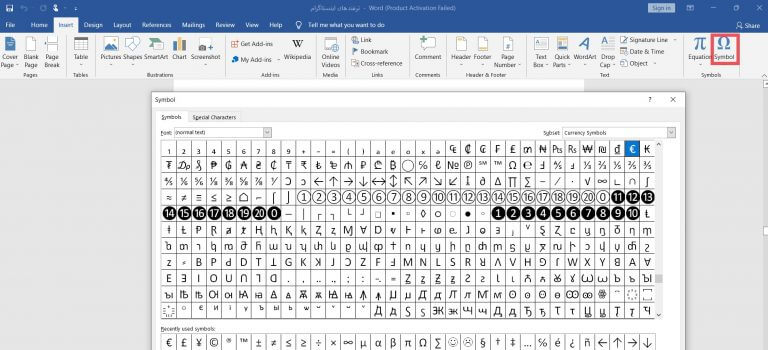
The second method: How to make custom emojis on Instagram when logging in with a PC?
If you are one of those people who use the desktop for any reason to log in to Instagram, do not worry at all. We have a solution for you that can make your bio more attractive and fantastic. All you have to do is go to Microsoft word software on your desktop and then copy any emoji you like from the Symbols section, as shown below.
It will be very straightforward from now on. You need to go to your Instagram page and touch the Edit Profile icon in the Profile tab. Finally, in the box where you wrote your bio text, paste the image you copied before.
The 7th Instagram tip: How to rearrange the Instagram filters in the order you like?
If you are one of those people who are very active on Instagram and post one after another, I want to teach you a special trick. Probably, every time you want to post, among the filters that exist and you can use them to edit the photo you want, there are one or two filters that are your favorites, and you basically use them. You must be tired and frustrated to spend a lot of time finding all the filters you like every time. I have good news for you. You can rearrange the Instagram filters in the order you like.
With the help of this trick, you can easily put the filters you like more than others first so that you can find them easily and without any trouble. All you have to do is to touch the filter you want and hold it for a few seconds. Then drag that filter with your finger and bring it to the top of the list. Now you can easily find your favorite filters without any delay.
The 8th Instagram tip: How to use Instagram as a photo editor?
There is a high chance that you love Instagram filters and would like to make your photos more attractive and fabulous with the help of these filters. Many Instagram filters are great for editing photos. But do you know what the problem is? Many times, we take a photo that we like very much but we do not want to post it on Instagram. You probably have this problem that sometimes you choose a photo from your gallery and edit it with Instagram filters, but when it comes to posting that photo, you change your mind and by choosing the Discard option, not only do you not post that photo, but all the efforts you have made to edit it wastes in an instant. So, what is the solution now?
Is there any way we can save a photo that we took so much effort to edit using the Instagram filters in our phone gallery without posting it on Instagram? It is clear that there is always a trick to solving any problem. We will teach you how to save edited Instagram photos without posting them. First of all, you must enable the save original photos option. To do this, take the following steps in order:
- Log in to your Instagram page and in the profile tab, touch the three-line icon at the top right of the page.
- Select the setting option.
- A new page will be displayed on which you must select the account option.
- In the account section, select the original posts option.
- Then, enable the save original photos option.
After enabling the save original photos option, put your phone in airplane mode. Now log in to Instagram and select the photo you want to edit. As always, follow the steps you need to take when you post a photo on Instagram. Edit your selected photo, write a caption, and finally, without worry, select the share option to post your photo. Since you put your phone in airplane mode, the photo you want will not be posted, but because you have enabled the save original photos option, the photo you wanted to edit has been saved in your phone’s gallery.
The 9th Instagram tip: How to sell on Instagram with a simple click?
This tip is more useful for people who have started an online business on Instagram and sell their products on it. Many of these pages have to work hard to be able to turn their followers into regular customers. But it has long been said that working smart is much better than working hard. Many business accounts, in order to be able to sell their products more easily, design a website and put all the goods available along with their prices on that website so that customers can access products and prices without any trouble.
But there is still a problem. It has always been difficult to introduce the website to your followers and encourage them to visit the website. Followers are not interested in searching and finding the main website, sometimes they may find another website and buy from it. Some Instagram business pages write their website URL in the caption of their posts, but it is still difficult for the potential custumer to copy the website URL and paste it into a browser. Because doing these things is hard and a little confusing for everyone, we teach you a trick that makes it much easier.
You may not know that you can write your website link in the Bio of your Instagram business page and your followers will be transferred to the website with just a simple click on the link. To do this, touch the Edit Profile icon in the Profile tab and enter your website link in the box that is related to the website address so that this link will be in your Instagram bio like the picture below.

Unfortunately, Instagram only allows you to put one link in your Instagram bio, and you cannot put more than one link in the bio of your Instagram business account.
The 10th Instagram tip: How to put multiple links in your Instagram bio instead of one?
Sometimes you need to share both the website URL and the URL of various blogs or events on your Instagram for your audience. Unfortunately, Instagram does not have the ability to insert multiple links in the bio and you can only put one link in it. However, thanks to free tools like Linktree, everyone can add multiple links on Instagram.
The 11th Instagram tip: How to set up auto reply on Instagram direct messages?
First of all, I must say that this tip only works for those who have a business page on Instagram. Those who have a business page on Instagram know that they have to deal with a lot of comments and questions every day. These are the only people who appreciate this fascinating trick that we are going to teach right now. What could be better than having the ability to automatically reply to comments? To use this trick, follow these steps carefully:
- Log in to your Instagram page and in the profile tab, touch the three-line icon at the top right of the page.
- In the list that appears, select the setting option and then the Business option.
- A new page will be displayed on which you must select the Quick replies option.
- In the shortcut field, enter a phrase of 1 or 2 words that roughly serves to categorize the answers. For example, you can write “returnpolicy” in the shortcut field and prepare text in advance for when the customer wants to return the purchased item.
- On the same page, just below the shortcut, there is a space where you can type the answer you want.
You can create a number of shortcuts for different situations and type a separate answer for each. Later, when replying to comments, instead of writing the full text of the message, just type the name you created for the shortcut to display the full text of the message. For example, in the example above, the name of this shortcut is “returnpolicy”. So, when replying to a comment from someone who wants to return the item they bought, just type the shortcut phrase so that the message you typed before is automatically commented.
The 12th Instagram tip: How to rearrange the order of highlights on Instagram?
Another fun tip we’re going to teach you is how to rearrange your Instagram highlights the way you want. You know that stories that are highlighted are displayed to your audience in their historical order. Do you think the order of highlights on Instagram can be changed so that you can put your favorite highlight at the beginning of the list? Since the last four highlights you put on the page are the first thing the audience sees, and the audience has to swipe left to see the rest of the highlights, this tip is useful for such pages that have a lot of highlights.
Be sure to learn this tip, as you may want to place a specific highlight at the beginning of the list. To do this tip, do the following steps in order:
1- Place your finger for a few seconds on the highlight that you want to be at the beginning of the list, then select Edit Highlight as shown below.
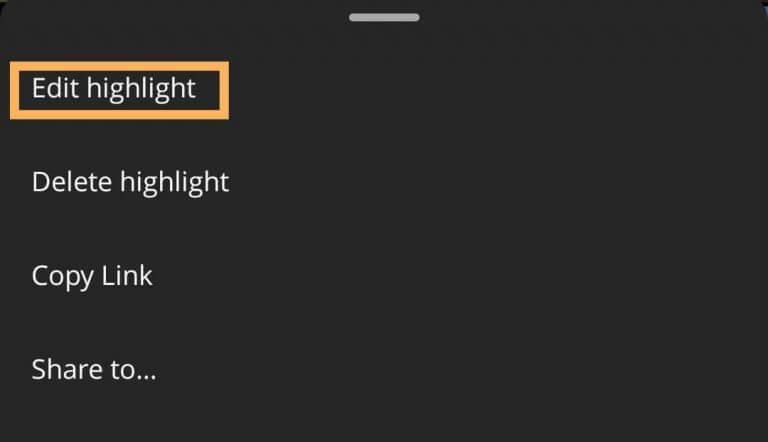
2- Then select a photo or video from your gallery and add it to your desired highlight. Do not worry at all. The photo or video you choose does not matter much, as it will be deleted in less than 30 seconds. So do not be obsessed with choosing a photo or video.
3- Now click on the Done option to add the photo or movie you selected to the highlight.
4- Now your selected highlight is at the beginning of the list.
5- Finally, you need to delete the photo or video you added. You can see that even after deleting the video or photo, the highlight does not move and is still at the beginning of the list.
The 13th Instagram tip: How to schedule Instagram posts
You are probably a little confused. What does it mean to schedule Instagram posts? Well, let me simply explain what I mean. In a word, we want to teach you a trick to learn how to post photos and videos that you are going to post in the future in another space and set an exact date and time for them so that they are on the same day and at the same time as pre-determined, to be posted. Isn’t it exciting?
As Instagram becomes more and more popular and more and more people are creating accounts in this application, it is natural that many programmers design and present websites and programs that are related to Instagram to attract the audience of this application and find more fans. You can use the tools we are going to introduce in order to schedule your Instagram posts and specify the exact day and time for them to be published on Instagram, so that they will be on your Instagram page on the exact same day and time. To do this tip, you must use a separate tool. For example, you can use the tools HubSpot, Later, Buffer etc.
Of course, the point that needs to be mentioned here is that in order to do this tip, your Instagram page must be business.
The 14th Instagram tip: How to get notified when someone posts on Instagram?
It often happens that we lose some posts. For example, we follow our favorite blogger or influencer page and wait for a long time for a special post or story. But for various reasons, we forget to visit Instagram, or that post and story is lost among a large number of other people’s posts and stories, and we do not see it at all. What should we do to solve this problem?
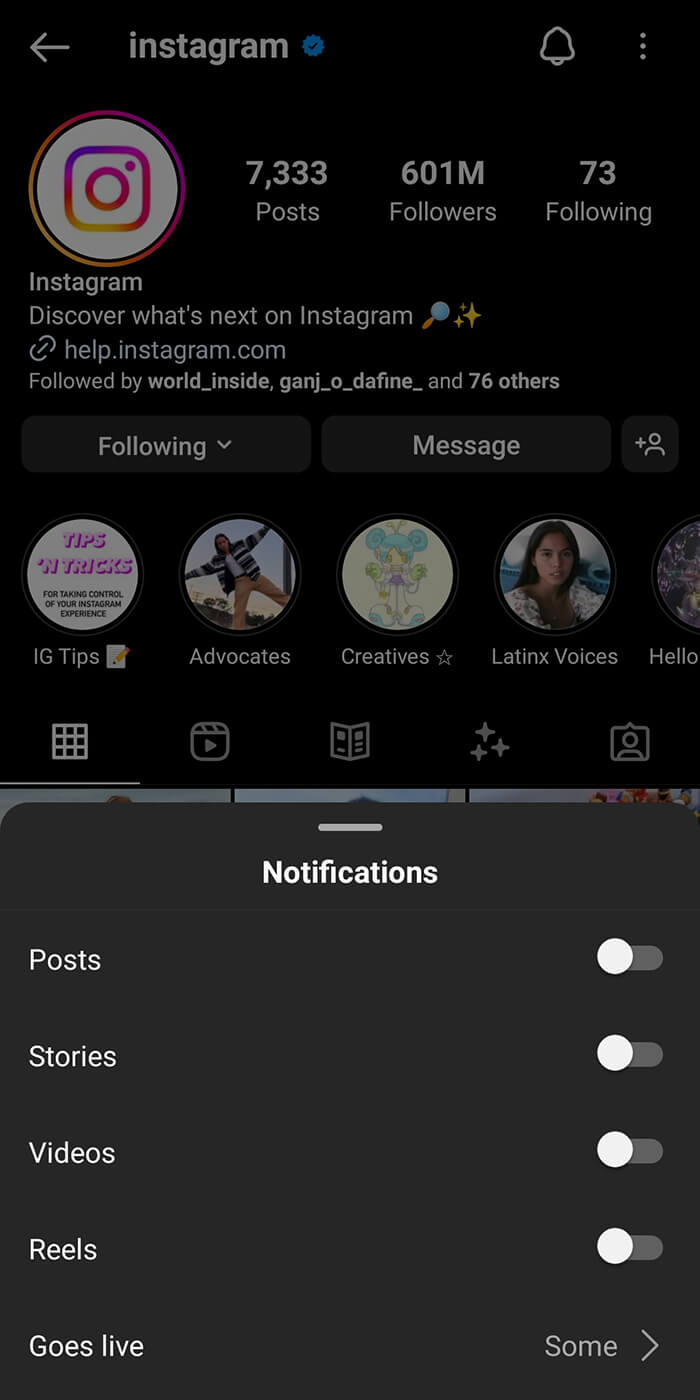
Do not worry at all. Right now, we will teach you an interesting and practical tip so that such a thing does not happen to you again. First of all, go to the page where you do not want to miss any of its posts and stories. Needless to say, you must follow that page. Then, as you can see in the image below, tap on the bell icon at the top right of the screen.
After you tap on the bell icon, a list like the one below will be shown to you where you can enable notifications for posts, stories, videos and reels on that page. This way, whenever your favorite page shares posts, stories, videos and reels, you will be notified and, as a result, you will not be left behind.
The 15th Instagram tip: How to hide tagged posts from your audience on Instagram
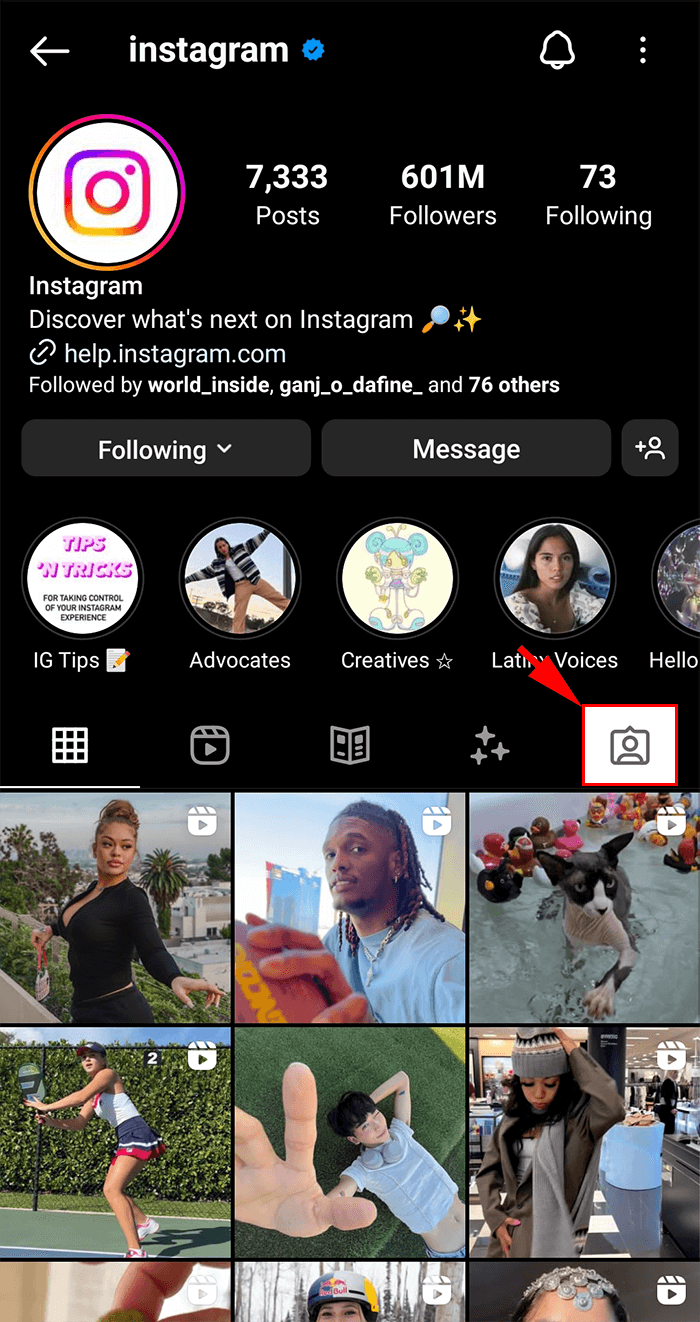
You may not know it, but if someone tags you in their post, that post will show up in your profile and your audience will be able to see it. The image below shows where these posts are on your page and your audience can see them with one click.
You may not want that to happen. For example, the posts you are tagged in are private and you want to hide them from your audience to keep your privacy. However, we are here to teach you a trick that can hide the posts you are tagged from the rest of your audience. To do this, take the following steps in order:
- Go to your Instagram page and in the profile tab, touch the dummy icon shown in the photo above.
- You will now see the posts where you are tagged.
- Choose one of the posts; It does not matter which one.
- Then, click on the Edit option.
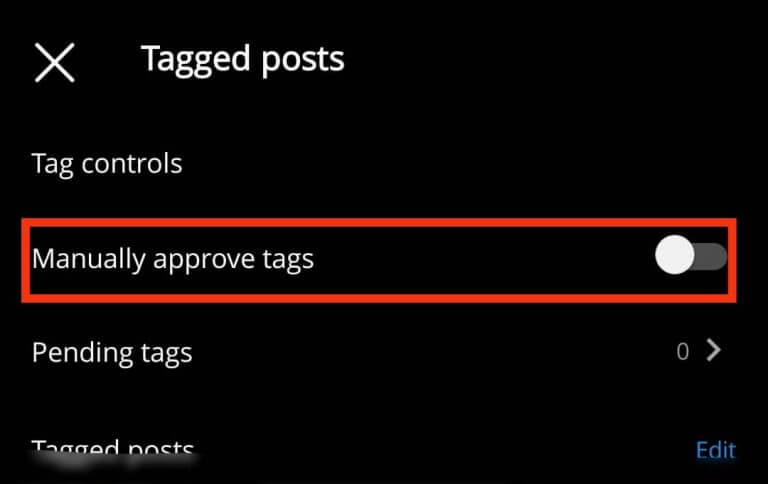
- Now, like the image below, select the Manually Approve Tags option.
- In this step, select any post in which you have been tagged and you want to hide it from your audience, and finally, tap on the Hide option.
This will not delete the posts at all and will only hide them from your audience. But it has long been said that prevention is better than cure. In the next tip, we will teach you that you no longer need to do these things. So, let’s move on to the next tip.
As we mentioned in the previous section, if someone tags you in a post, that post will be in your profile and, as a result, your audience can see it. You may not have heard, but you can set up your Instagram so that every time someone tags you in a post, Instagram will ask your permission before that post is shown in your profile. Isn’t it very interesting? To do this, follow these steps so you no longer have to worry about this:
- On your Instagram page and in the profile tab, go to the section where the posts you are tagged are located.
- Select one of the posts.
- Click on the Edit option.
- A new page will appear where you have to select “Tagging Options” and then “Add Manually”.
- Finally, enable the “Manually Approve Tags” option, as shown below.
From now on, Instagram will ask your permission before your tagged posts are displayed in your profile.
The 17th Instagram tip: How to get verified on Instagram?
Do you think it is hard to get a blue check on Instagram? Are you wondering about how to get a blue check on Instagram? Everyone who uses Instagram knows what a blue tick/check is. The blue tick, as you can see in the picture below, is a sign given to you by Instagram, indicating that you are a celebrity, a well-known figure, an influential person, or the owner of a global brand that operates on Instagram.
Of course, Instagram doesn’t give you a blue tick/check easily. In fact, you should ask Instagram to give you a blue tick. The following steps are necessary to get a blue tick on Instagram:
- Log in to your Instagram account and in the profile tab, click on the three-line icon at the top right of the page.
- A list will be displayed in which you must select the setting option.
- A new page will open on which you must select the Account option and then “Request verification”.
- In this step, you have to fill in the necessary form and finally send it.
Instagram will review your request and give you a blue tick if you are qualified for a blue tick. Of course, keep in mind that your request may not be approved and you may not be able to get a blue tick.
Suggested articles to read more!
- How to create Instagram account via mobile & PC?
- How to delete Instagram account permanently & temporarily step by step?
- How to recover disabled (deleted) Instagram page?
- How to make a great Instagram page?
- How to get more comments on Instagram posts, fast & free?
- What to post on Instagram Reels to build your brand and to expand your business?
- Instagram algorithm to grow followers
- Mention limit on Instagram & how to get rid of?
- CSRF token missing or incorrect in Instagram
- How To Create an Instagram Shop? [Step-by-Step Tutorial]
- How to make money on Instagram Reels in US?
- Trending songs on Instagram reels today
Final words about tips on how to use Instagram?
Those who use Instagram know that this app has a lot of interesting features that many are unaware of. If you are interested in learning a lot of these tricks and using them, it is better to read this article carefully. In this article, we tried to teach you many interesting and practical tricks and tips to use when using Instagram and enjoy working with this social application as much as possible. What other interesting tricks do you know?
For more information about Instagram and the features of this social network, we suggest that you click on Free Instagram Tutorial [+]. Also, if you have any questions about Instagram, you can ask them in our Instagram support center [+] in the form of a topic and wait for the answer of our experts.
Please give this article 5 stars if you wish. If you have any questions, ask us in the comments section.